MVR
MVR Import and Export
Import
Depence supports the import of MVR files. You can import fixtures, patch, fixture position, fixture IDs and 3D models with the MVR file. You find the option under File->Import->Import MVR File...
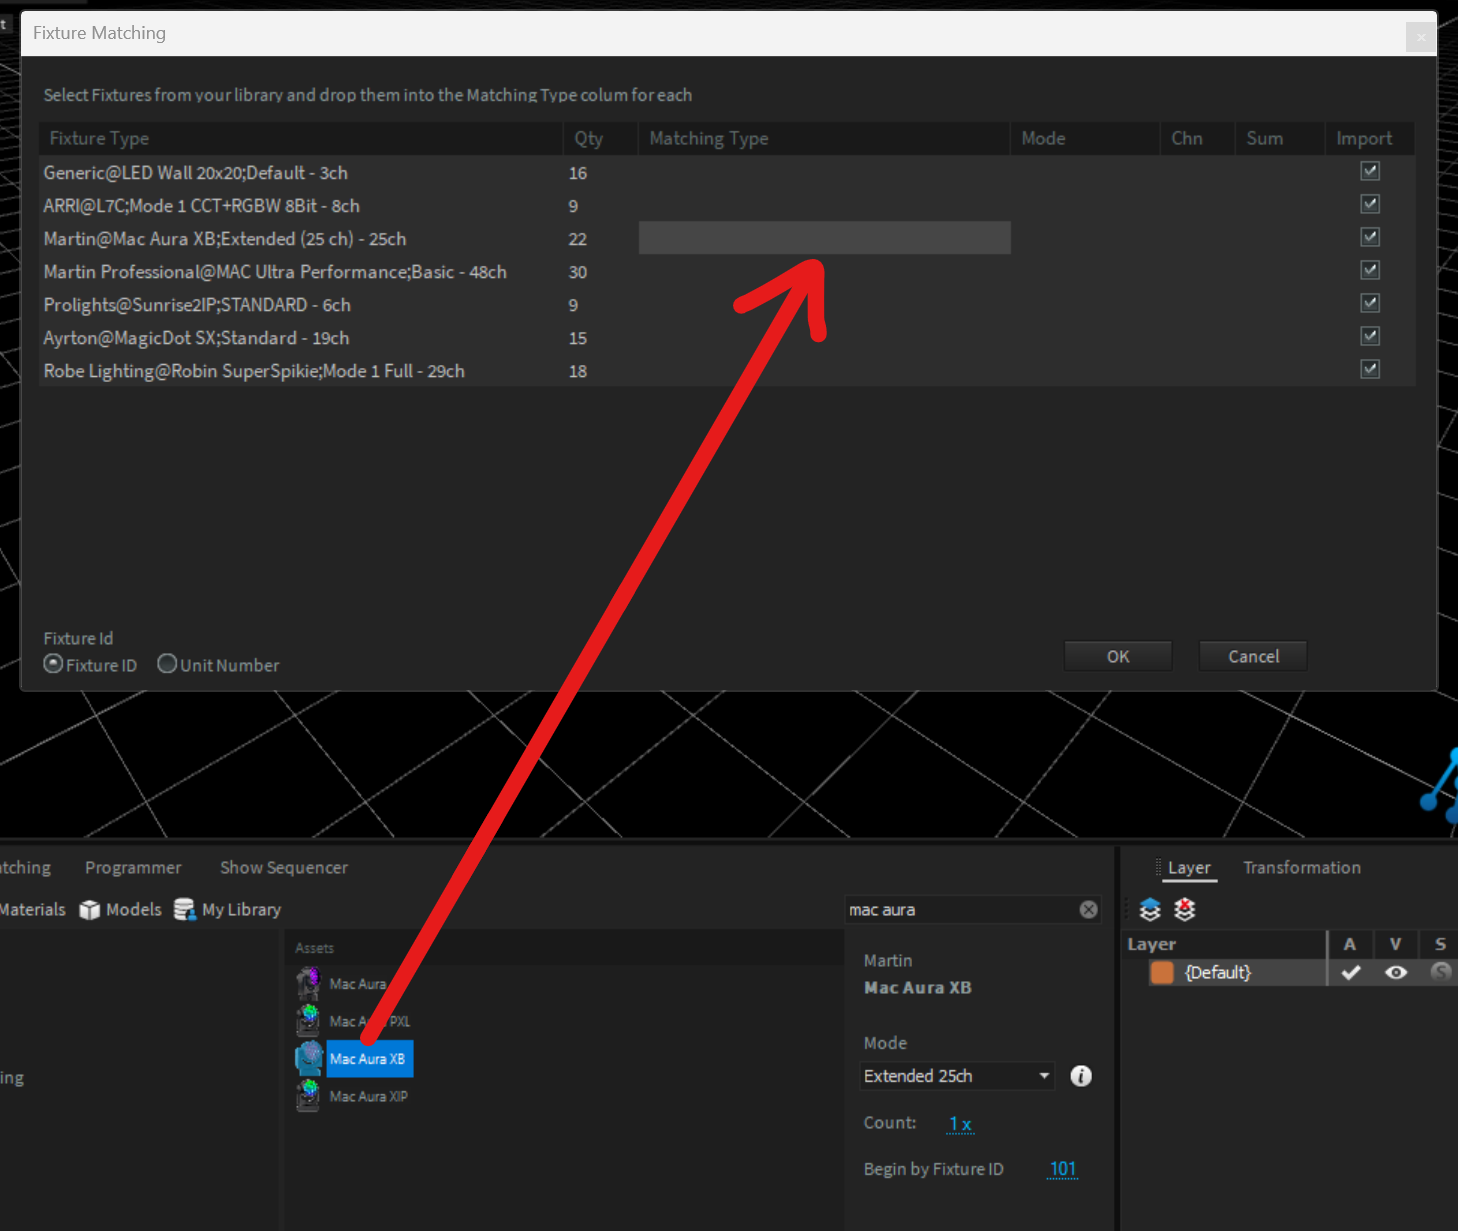
After you have selected the MVR file, a window will open in which you need to match the imported fixture types with fixtures from the Depence library. This is needed, because Depence doesn't use the gdtf file format for the fixtures.
In the matching window, you can drag fixtures from the Library window into the Matching Type column. You need to make sure, that you select the correct DMX mode first, before you drag it into the Matching Window.

After pressing OK, Depence will finish the import.
Import & Update options
If your project already contains fixtures or 3D models you should consider the following settings where you can decide how to handle new and already imported objects:

The "Remove none exist.." option only refers to objects who where imported by an ealier version of the MVR file. Objects added manually or by a different MVR file won't be touched.
Export
Depence supports a limited MVR export as well. Depence will currently only export dummy fixtures, because Depence use its own fixture format, which is not compatible with the GDTF file format. Additionally Depence does not export 3D models.
You find the MVR Export function in the main menu under File->Export->Export MVR file...

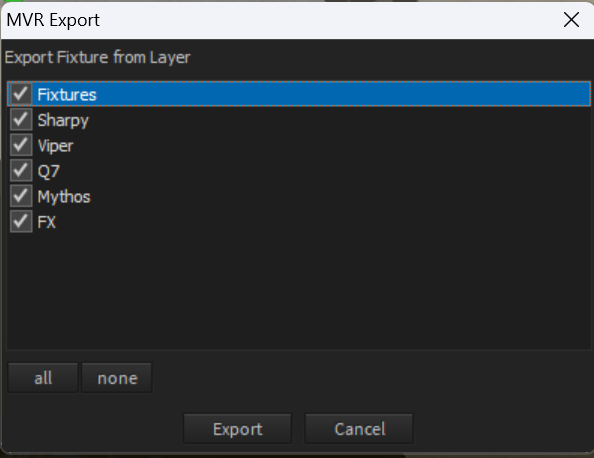
In the MVR Export window you can select the layers, which you want to export. After pressing Export you can select the export location.
You can import the MVR file into for example your lighting console or a CAD program.