Camera Animation
For most animations, you might need a natural Camera movement to show your setup from a different point of view. To animate a Camera, the Keyframe Animations are used together with an additional Camera object.
Add Camera Object
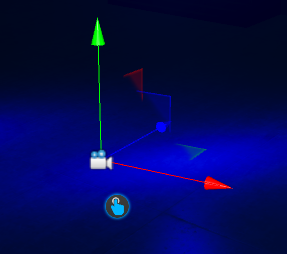
The 3D-Viewport is using the standard inbuild Editor Camera by default, which is not represented in the SceneGraph. To get an accessible and selectable Camera Object you would need to create one. Therefore go the Main Menu > Create > Scene > Camera. Creating a new Camera object will place it in the same position as your current Editor camera. Just move back to your Editor Camera to see the object:

Note: Cameras are always looking at the Z+ direction.
Add Camera to Timeline
As same as with other Objects, the Camera Object can be animated by dragging the Camera using the Drag-Icon, into the Timeline track view. The initial keyframes will be created automatically on the current Cameras position.
Change Viewport Camera
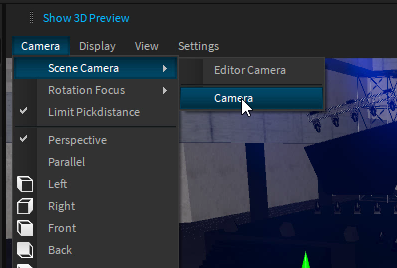
As mentioned earlier, the Viewport uses the Editor-Camera by default. You can change the active Camera on the Viewport-Menu > Camera > Active Camera.

Now you can move and rotate the Camera-Object with your mouse in the same way as your editor camera.
Lock-Z Rotation
In some circumstances you might notice that while interpolating between two camera positions, the Camera's Z rotation might be rotated accidentally. This happens, because rotations can't be interpolated linearly without affecting all rotation axes. To prevent this, it is possible to lock the Z rotation for the Camera.
Select the Rotation Track of the Camera.
In the Settings Window > Check "LockZRotation".
This option will always keep the Camera aligned to the horizon.
Camera Selector
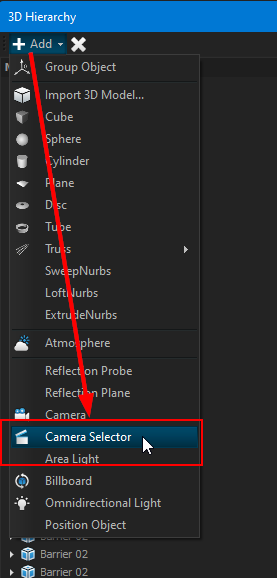
The ![]() permits to switch between all cameras present in the SceneGraph.
permits to switch between all cameras present in the SceneGraph.

Add it into the SceneGraph, and drag and drop it into the Timeline. Then you can keyframe the Active Camera setting of the Camera Selector.

Last updated